I am so excited to finally share my Fingerless Gloves/Wristwarmer pattern with you! There are many patterns out there, but what I love about these are their simplicity. They are made almost exclusively with Half Double Crochet stitches, so they are quick to work up. The camel stitch detail is really what sets these apart from other more basic gloves. I have added buttons on the cuff to help distinguish between the left/right gloves. They will fit anyone from tween-adult woman. I have also created this pattern in Men’s, Children’s, and Toddler size!

Feedback I have gotten from people who have a pair of these is amazing. My daughter loves them because she is still able to get into her backpack, zip her coat, and most importantly, use her phone while wearing them. Haha… My sister and mom both work in offices and they like these because they are still able to use their computer and process paperwork and their hands stay warm. These also make wonderful driving gloves since you can still safely grip the steering wheel and use the touch screen (if your car has one) or be able to feel the buttons.
These make great gifts, and since they work up quickly they are ideal inventory for craft shows. They are always one of the first things to sell out for me at shows. I wrap them with a cigar band that I designed… you can find a basic, free printable PDF for the band HERE, or CLICK HERE to order a personalized PDF in my Etsy shop!
Get an ad-free printable PDF of only the Women’s size via Ravelry or Etsy. Get an ad-free printable PDF of all 4 sizes, toddler, child, women’s, and men’s via RAVELRY or ETSY.
I am happy to announce that I now have 4 sizes of this available HERE! Get 50% off of the e-book on ravelry with promo code: FAMILY until Monday, July 20 at midnight EST.

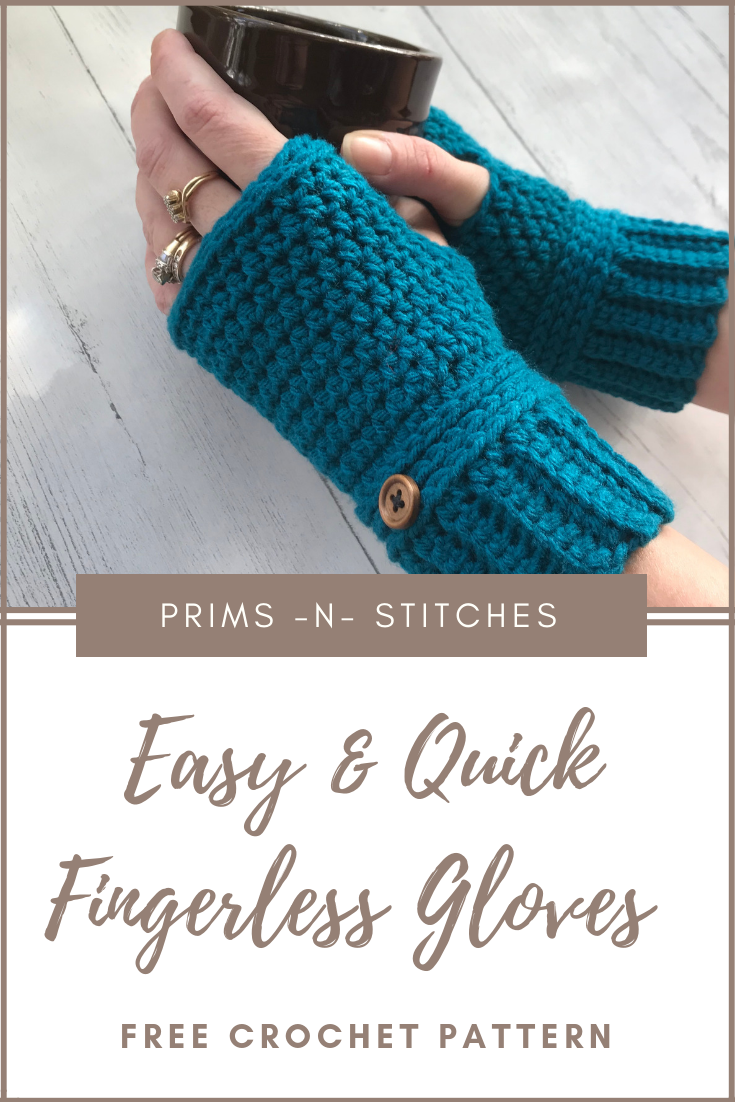
Quick & Easy Fingerless Gloves
Abbreviations/special stitches used:
SLST- slip stitch
CH- chain
SC- single crochet
HDC- half double crochet
STS- stitches
BLO- back loop only
3rd loop- back bar of half double crochet, also known as camel stitch.
HDC2TOG- 2 half double crochet together; decrease
SC2TOG- 2 single crochet together; decrease
Yarn: Any worsted weight (4) yarn will work.
Hooks: G (4.0mm) and H(5.0mm)
Final measurements: Glove will be 6” tall and 3.5” wide (widest point) when laid flat.
Note:
– Beginning chains do NOT count as stitches. Join all rounds into the first stitch of the row, not the chain. Start the first stitch in the same space as join.
– There are 2 versions of round 9, for left and right glove.
Instructions:
Cuff: *use G hook*
*note- when making ribbing I like to make a standard SC (under both loops) in first and last stitch of each row. I find this gives a nicer edge. You can SC BLO throughout entire ribbing if you prefer.
Row 1: ch 9, SC BLO in 2nd stitch from hook. (8 sts)
Row 2-28: CH 1, SC in first stitch, SC BLO in next 6 sts, SC in last stitch. (8 sts)
– Bring first and last row together to form a circle. Slst closed, going through back loops of last row completed and chain spaces from first row. (8 Slst.) You will now be working in the top side of the SC ribbing to complete your glove, where your working loop is. I like to turn it inside out at this point to hide the seam.
Body of Glove: *switch to H hook*
*Join each round to top of 1st stitch made*
Round 1: Ch 1, HDC around evenly. (28 sts)
Rounds 2-4: Ch 1, HDC in 3rd loop (back bar) of each stitch around) (28 sts)
Rounds 5-8: Ch1, HDC in each stitch around. (28 sts)
Round 9 (right glove): Ch 1, HDC in first 18 sts, Ch 3, skip 5 sts. HDC in next 5 sts. (23 HDC and ch 3 space made)
Round 9 (left glove): Ch 1, HDC in first 5 sts, Ch3, skip 5 sts. HDC in next 18 sts. (23 HDC and ch3 space made)
Round 10: Ch 1, HDC in each HDC from previous round. Place 3 HDC in the chain space made in previous round. (26 sts)
Round 11-12: Ch 1, HDC around. (26 sts)
Round 13: Ch 1, HDC2TOG, HDC around (25 sts)
Round 14: *this round is completed in the 3rd loop of previous round) Ch 1, SC2TOG, SC next 21 sts, SC2TOG. (23 sts)
*FINISH OFF AND WEAVE IN ENDS* I like to add a little button to the side to help distinguish between the left and right glove.

© 2018 Prims -N- Stitches All Rights Reserved. Please do not copy, resell or distribute my patterns or the pictures within, on or offline. Share the link instead of the pattern. Feel free to sell finished items made by using this pattern, and please give credit to me as the pattern designer
Can’t find the pattern for mens fingerless gloves
Hello! The men’s pattern is not available for free on the blog, but can be purchased in a bundle either through etsy or ravelry. The links are in the menu of the site.
Hi there! Love this pattern so much! I’m a pretty new crocheter and I just wondered if it is standard to CH1 and turn your work after each row, even if it’s not explicitly written in the instructions. I know that you have CH1 at the beg of each row, so I wasn’t sure if I should just be turning without the CH1. Thanks!
Hello! For this pattern you will not turn your work with each row.
I would just like to thank you so much for this pattern!! I love it, easy and quick as you say. I have made so many pairs of these and they were a hit last year. I have many grandchildren and great grands, also. They make up so tidy and nice looking …..esp. when you get a little button on, they look classy. Thank you, super great pattern!!!
Thank you!
Hi!
Is there a gauge swatch for this pattern pls?
Thank you
I did not do a guage swatch since this is such a quick item to work up. There is a finished glove measurement. Just be sure to switch your hook size where noted in the pattern.
Thank you for replying.
Two more queries pls.
1. If I increase the number of rows in the cuff, then how would the thumb placement change? Would it still be offset by 5 stitches?
2. Do you have an Instagram page? I would like to tag you when i post a picture.
I too would love the answer to this. I used #4 yarn but it seems very thin to be considered #4 and so my cuff only doing 28 rows is much too small and I will need to add several rows to the cuff to make it fit. Should I still only skip 5 stitches on the thumb hole on round 9?
Hello! yes, I would still only skip 5 stitches, but you may have to alter where the thumb hole is to make sure the seam is hidden on the palm side of the glove.
Is there a YouTube tutorial for this pattern?
Sorry, there is not. Maybe something to do in the future!
Hello! You would keep the size of the thumb hole the same, however where you start skipping stiches may change in order to keep the seam in the palm of the glove (and hidden). My instagram is @primsnstitches
This pattern is great. Works up real fast. I made a pair for my mom and it became instant hit. I got many requests from family members.
Thanks for sharing.
Hi, great pattern. Can I ask what size buttons you used?
Thanks!
Hello! I try to use around 1/4 inch buttons or smaller.
Thank you so much for posting this pattern. I made a pair in maroon for my mother. Her left hand has a nerve problem so she needs something tight to keep her palm straight.
Is there supposed to be a hole showing where you chainnone between rounds?
Looks funny…lol. Also could you make a video of this??
I do not get a hole. Be sure that you aren’t counting the chain one as a stitch, and you are joining each round to the top of the first HDC.
Thank you!!
Hi there, was wondering if you had the pattern for the men’s size ready? What would your recommendation be for extra rows/stitches for an average men’s hand?
It is ready! I am updating the blogpost tonight to include the link 🙂
Thank you for this pattern! I was trying to figuring what I could make for a Christmas gift for my cousin’s
20 year old daughter. I had looked at other patterns and they seemed kind of plain but when I came across this one I liked the detail and even though I consider myself a beginner I thought I’d try it.
So happy I did! It will be just the right gift for her.
Thank you!
On the “3rd loop” rows, when joining at the end of the row, do you insert the hook under the usual “V” of the first stitch in the previous row, or into the 3rd loop of that first stitch? Thank you so much for this pattern. Love these gloves!
I usually join under the V as usual. They are designed so that the seam is not visible from the top of the glove, it goes from wrist up the palm.
Hola como estas, tienes video por Youtube?
Sorry, I do not.
After I try to make these may I have permission to sell them at craft fairs?
Absolutely! Thank you for asking 🙂
Could u please tell me since I am left handed if I make this pattern as it is written will they work okay for me since I don’t see a left handed version.
Thank you kindly,
Kim
Hi Kim,
I really am not sure as I cannot crochet left-handed, but if you would like to try it I would love to know how it worked for you!
I am left handed and had no problem crocheting these. I’ve made several pairs that the recipients wear as often as yesterday 🙂
i am left handed and yes it works out the same, Fern
Have u did the child size of this pattern. I just love the pattern but would like to make some smaller ones. Thanks Judy
It’s coming soon! 🙂
Hello,
I like you crochet. Can you say me, how can I get that in German ?
Thanks a Lot!
Best regards
Bianca
I’m glad you like them, thank you. Unfortunately I do not know German, possibly there is a program you can use to translate?
Do you happen to have a top pattern for these? I was making them for my mother and she says they need a top, as in a convertable mitten…
I have done it before but did not write it down. I will see what I can do 🙂
Hello. I was looking at the ones you made and I don’t see your seem. Mine sticks out so badly. Any tips?
These are designed so that the seam will be hidden on the underside of the glove. If you can see the seam while wearing them, switch hands. The seam then is on the palm of your hand and less noticable.
Like Nancy K above, I wondered if you can suggest how much yarn? Anxious to buy enough to make several pairs in different colors. Thanks!
My finished gloves weigh approximately 48-58 grams depending on brand of yarn I used, which converts to about 107 yards (when using a weight of 60g, Hobby Lobby I love this Yarn was used to determine final yardage). You will want to make sure you add a few grams and/or yards when you are calculating to leave room for tails and if your gauge is slightly different than mine. 🙂
My coworker requested fingerless gloves for her birthday and I’m SO grateful I stumbled upon this pattern! It was quick, easy, and very well written. I was able to use stash yarn and they were so easy to make, she’s getting 2 pair. Thanks for sharing this pattern.
Thank You!
Hi…did you use Red Heart Soft in pattern…love the colors you shown🙃
I used a combination of different yarn- whatever I have in my stash, this picture was taken a few years ago and I don’t remember specifically. This is definitely a stashbuster pattern for me. 🙂
I have lots of partial skeins of yarn I would love to use for this pattern. Can you tell me approximately how many yards are used in this pattern?
Hi Nancy! My finished gloves weigh approximately 48-58 grams depending on brand of yarn I used, which converts to about 107 yards (when using a weight of 60g, Hobby Lobby I love this Yarn was used to determine final yardage). You will want to make sure you add a few grams and/or yards when you are calculating to leave room for tails and if your gauge is slightly different than mine. 🙂
Also, one more question. I turned my cuff inside out to hide the seam like you suggested, but now the pretty hdc third loop pattern is on the inside! Lol. What did I do wrong?
Thanks!
I turn the cuff inside out as soon as I slip stitch it together, then start to work the hdc stitches.
Thank you for such an easy pattern!!! I can wip up a pair of these in about an hour and I love it!
Hi, I’m working on these gloves for myself, and I’m enjoying the pattern a lot so far! It’s really clearly written.
I’ve run into one problem though, the cuff is so wide that it just slips down my wrist! Do I just go back and remove a few rows from the ribbing before slst it closed? When I pinch the cuff close to my wrist without stretching it, there’s nearly 6 stitches extra! I know I’m a small adult but would removing 6 rows be too much? I’m still new to crocheting clothing and I don’t really know how to judge how to adjust a pattern to fit me.
Thanks in advance for any help, and thank you for this lovely pattern!
Its possible that you crochet loose. I would suggest going down 1 hook size or trying to tighten your tension a bit. Thank you for the kind words!
Hi, thank you for this amazing pattern, I’ve made 3 so far…I just want to ask how to modify it for a 10years old girl… thank you
Thank you, I’m so glad you like it! I am still working on numbers for my child and adult sizes, but if you have the child handy you can try it on as you go to see how many stitches and rows you need to reduce.
I was wondering if this would fit someone that wears a large ladies glove?
Hello! They should fit, this pattern is easily customizable so if they seem a little tight you can always add 2 or 3 rows to cuff, then when you continue to the body of the glove you will have 2 or 3 extra stitches around. You can also add an extra row before or after the “thumb hole” round.
I really enjoyed this pattern and like very much the instruction to put the first & last single crochet under the full stitch in the cuff portion. It sure makes a professional looking edge
Thank you so much for this pattern! I’ve tried several ones for fingerless gloves and I’m just not in love with them. This latter was super easy to read and follow. I made a pair in maybe 1 hour give or take.
You’re welcome! I am so glad you are enjoying it!
wonderful design! i will do some for this winter! 😉
thank you very much for sharing such great pattern! 🙂
You’re welcome, and thank you!
Thanks for the add. I’m excited to make these fingerless gloves for my granddaughters
Thank you! Please feel free to add any pictures of completed projects on my ravelry pattern page 🙂
Thank you for the pattern. They’re wonderful. I want to know, when you finish a row do you join it to the first stitch of that row or do you just start the second row onto the top of the first stitch. Does that make sense.
All rows are joined to the first stitch. It is not worked in continuous rounds. Thanks!
Just finished my first glove and I love this pattern! I’m a beginner so I may have miscounted stitches or not completed the join correctly. My seam on the outside looks neat but it starts to veer right after the camel stitch rounds. Is that normal? If so, great! If not, I want to make my next set better. Thank you for sharing your beautiful work.
Yes, that is normal. Thank you for the kind words!
Do you have any patterns for fingered gloves?
I do not at this time.